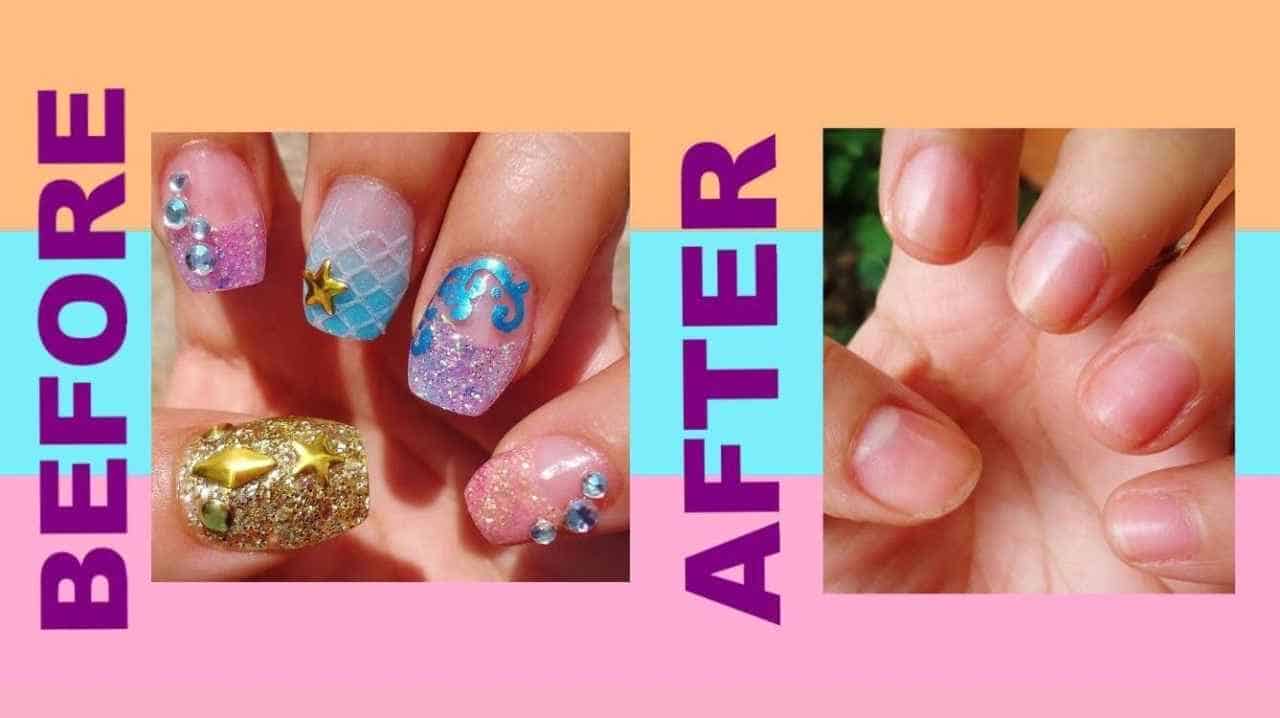
Are you tired of those beautiful acrylic nails and wondering how to safely bid them farewell? The process of acrylic nail removal, while seemingly simple, demands careful attention and the right approach to protect the health and integrity of your natural nails. Neglecting this can lead to significant damage, leaving your nails brittle and prone to breakage. Whether you're a seasoned acrylic enthusiast or a newcomer to the world of artificial nails, understanding the intricacies of removal is paramount.
The journey to beautiful, natural nails begins with informed decision-making. The search for "acrylic nail removal near me" is often the starting point, leading individuals to explore options ranging from professional salon services to the temptation of DIY removal. The appeal of saving time and money through at-home methods can be strong, but the potential pitfalls are equally significant. This article will delve into the multifaceted world of acrylic nail removal, offering insights into the safest and most effective practices.
When considering the removal of acrylic nails, the professional route is almost always the superior choice. Expert nail technicians possess the skills, tools, and experience to gently and efficiently remove acrylics while minimizing damage. However, if circumstances compel a DIY approach, thorough research and careful execution are essential. The following sections provide a comprehensive guide to acrylic nail removal, covering everything from understanding the different types of artificial nails to mastering the art of safe removal.
Acrylic nail overlays, a popular choice for enhancing natural nail length and strength, offer a temporary beauty boost. They are favored for their durability and ability to withstand everyday wear and tear. However, their longevity is a double-edged sword, as the same properties that make them resilient also make their removal a delicate process. Understanding the structure of acrylics and the techniques used to apply them is the first step in achieving a successful and damage-free removal.
The cost of acrylic nails varies considerably, typically ranging from 5 to 45, depending on the salon, location, and the complexity of the design. This price tag also reflects the time commitment, as a full set of acrylics can take up to 2 hours to apply, while the acrylic nail refill can take less time. The typical lifespan of acrylic nails is 2 to 3 weeks, at which point a refill or removal becomes necessary.
For those in Ipswich, the quest for "Find local salons for acrylic nails near you in ipswich" will provide a range of options. Fresha is a convenient platform for booking appointments, including acrylic nail extensions, full sets, and removal services. Similarly, in Dubai, the search for "Best acrylic nails near me in dubai" can lead to finding reputable salons. The option to "Compare photos, reviews, prices, menus & opening hours" is valuable for making an informed decision, ensuring that the salon meets the individual's preferences and budget.
Venturing into the world of nail care also brings you to Venus Nails & Wellbeing Spa. Located in Kensington, London, they provide nail and head spa treatments. Professional environments like these are crucial to learn the best ways to get your nails done.
When it comes to removing acrylic nails yourself, preparation is the key. Gather all necessary supplies: acetone, cotton balls or pads, aluminum foil, a nail file, a cuticle pusher, and a buffer. Acetone is the primary solvent used to dissolve the acrylic, so ensure you have enough to complete the process. A coarse nail file is also essential to remove the top layer of the acrylic, while a cuticle pusher will help in gently lifting the softened acrylic from the natural nail.
The first step in DIY acrylic nail removal involves filing down the acrylic nails. This reduces the thickness of the acrylic and allows the acetone to penetrate more effectively. Use a coarse file to carefully remove the top layer, being cautious not to file down to your natural nail. This step requires patience and a steady hand.
Once the top layer is filed down, the next step involves soaking the nails in acetone. This can be achieved by either soaking your fingertips in a bowl of acetone or, for a more effective method, by wrapping each nail individually in acetone-soaked cotton balls and covering them with aluminum foil. This creates a warm environment that accelerates the dissolving process.
Allow the nails to soak for about 20-30 minutes. The acetone will soften the acrylic, making it easier to remove. After this time, check the nails to see if the acrylic is soft and has started to lift from the natural nail. If not, rewrap and soak for another 10-15 minutes.
Gently push the softened acrylic away from the nail using a cuticle pusher. Avoid forcing the acrylic, as this can cause damage to the natural nail. If the acrylic is not readily removed, return to the soaking process.
Once the acrylic is completely removed, gently buff the natural nails to smooth any rough edges. Apply a nail strengthener and moisturize the cuticles and nails with a hydrating oil or lotion. This will help to restore the natural nails after the removal process.
If you're aiming to get "safe and professional nail removal for gel, acrylic, or dip nails," it is worth looking at the options available around you. "Book expert nail removal services near you today!" is an encouraging call to action, indicating the presence of professionals. "Hard gel (also called traditional or standard gel) is similar to acrylic in its chemical makeup," so keep that in mind.
Whether you're dealing with gel, acrylic, or any other type of artificial nail, this guide covers everything you need to know about nail removal. With knowledge, preparation, and careful execution, you can transition from artificial nails to natural nails, minimizing damage and promoting nail health.
Remember, there will always be salons that specialize in certain types of nail enhancements. The most important factor is the safety and health of your nails.
The time required for acrylic nail removal, can vary depending on the method used and the thickness of the acrylic. Professional removal typically takes 30 minutes to an hour, while DIY removal may take longer. Acrylic nails new set time can also take around 2 hours. The key to success is patience and a commitment to protecting the health of your natural nails.
So, next time when you're searching for the best services, think of your nails first.
To help ensure safety, there are resources you can refer to online. Consider consulting the information on the website of the Nail Manufacturers Council, which provides detailed information on safe nail care practices, including acrylic nail removal.
| Category | Details |
|---|---|
| Procedure Type | Acrylic Nail Removal |
| Description | The process of removing artificial acrylic nails from the natural nails. |
| Methods |
|
| Tools & Materials (DIY) | Acetone, cotton balls/pads, aluminum foil, nail file (coarse grit), cuticle pusher, buffer, nail strengthener, moisturizing oil/lotion. |
| Steps (DIY) |
|
| Time Required | Professional: 30 minutes to 1 hour. DIY: Variable, depending on skill and acrylic thickness. |
| Cost | Varies depending on location and service (e.g., prices are between 5 and 45 in the UK). |
| Safety Precautions |
|
| Potential Risks | Nail damage (thinning, breakage), skin irritation, chemical exposure. |
| Alternative Options | Gel nail removal, dip nail removal. |
| Recommended Resource | Nail Manufacturers Council |